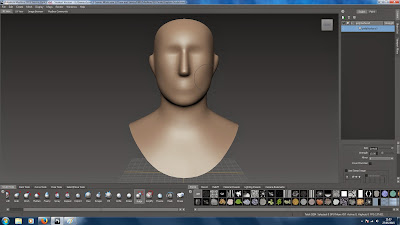
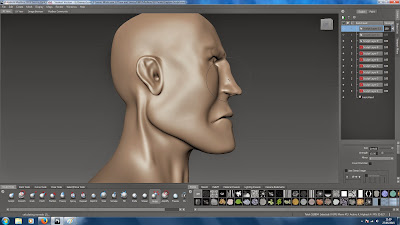
 Step 1: To begin the sculpt I loaded up the basic mudbox head mesh.
Step 2:
Here I used the grab tool to create a basic nose I also added an indent to the side of head near the eyes and changed the jawline. I should really start from top to bottom or bottom to top as it will make my design process easier to get the form and size of form right however, I began from the centre with this design.
 Step 3:
Here I used the grab tool again to change the shape of the sides of the head. Ive also made a brow bone. I then added some detail to the neck area. Check human anatomy for reference.
Step 4:
Here I used the grab tool to pull the inside of the mouth into the mesh. This replicates the inside of the mouth.
Step 5:
I Then used the bulge tool to add a bit of thickness to the lips and i also used the grab tool to from the cheek bones. I also created the philtrum under the nose.
Step 6:
I made some adjustments to the jaw line to make it look wider, I also added some thickness below the cheek bones to create a more realistic face. I also created the eye ball sockets.
Step 7:
Here I used the bulge tool to add some thickness to the eye brow bone, and I also added some detail under the lips. I then used the grab tool to change the lips line, and I also made the eye brow bone slightly raised to create an angry facial expression.
Step 8:
This is how the jawline looks from the side. I also added some basic shape to the ear. And I added in the sternocleidomastoid muscle, although the muscle doesn't stick out as much and is much larger, this is a mistake I will have to keep in the design for now.
Step 9:
I added slightly more detail to the inside of the ear, I didn't add to much as this will be covered by hair later so I don't want to waste to much time here.
Step 10:
I sent the mesh over the Maya and added is some basic eyes. I then formed some basic eye lids.
Step 11:
I added some depth around the eyes and eyelids. I also moved the brow line up. I also added more detail to the eyelid.
Step 12:
I added some wrinkles to the nose and forehead. I also added the scare across the face. Lastly I added the skin on the lip where the bone piercing would be.
Step 13:
Here is a quick shot of the back of the head. Ive added some basic muscle to the back, and added the indent to the back of the skull.
Step 14:
For the inside of the mouth I added very basic tongue and teeth, as this is barley visible on my design I didn't add to much detail.
Step 15:
I then added the piercing to the lips.
Step 16:
I moved over to Maya and added this very basic hat to the mesh. I didn't add to much detail in Maya as I knew I could do this in Mudbox.
Step 17:
I began to move the hat mesh around to get a shape I liked.
Step 18:
I then added the detail, I tried to match the hat up as close as possible to my design, I think I did a fairly decent job at this. To do this I used the grab tool.
Step 19:
I then used the bulge tool to add some detail to the tips of the hat, I also used the grab tool to pull down the top of the hat.
Step 20:
I then added this thick part around the top of the head under the hat. This represents the bandanna, I felt it would be easier to do this way and it would take me less time.
Step 21:
I then saved the model and exported it as an .Obj and used the import 3d mesh tool to get my pirate into Zbrush. I then watched tutorials on how to use the FiberMesh tools to create the hair. I think for my first time using FiberMesh I did a pretty decent job.
Step 22:
This was my first time using Polypaint and sadly I didn't know how to paint in layers or if its possible to paint in layers (I'm pretty sure it is) so i only have this one screen shot. But I am still happy with the outcome of this design.
Here is my final render of my pirate I'm happy with how he looks with FiberMesh rendered. However the bandanna could of been much more detailed looking at it now.


No comments:
Post a Comment